CI/CD integration
info Hint This chapter covers the Nest Devtools integration with the Nest framework. If you are looking for the Devtools application, please visit the Devtools website.
CI/CD integration is available for users with the Enterprise plan.
You can watch this video to learn why & how CI/CD integration can help you:
Publishing graphs
Let's first configure the application bootstrap file (main.ts) to use the GraphPublisher class (exported from the @nestjs/devtools-integration - see previous chapter for more details), as follows:
async function bootstrap() {
  const shouldPublishGraph = process.env.PUBLISH_GRAPH === "true";

  const app = await NestFactory.create(AppModule, {
    snapshot: true,
    preview: shouldPublishGraph,
  });

  if (shouldPublishGraph) {
    await app.init();

    const publishOptions = { ... } // NOTE: this options object will vary depending on the CI/CD provider you're using
    const graphPublisher = new GraphPublisher(app);
    await graphPublisher.publish(publishOptions);

    await app.close();
  } else {
    await app.listen(3000);
  }
}
As we can see, we're using the GraphPublisher here to publish our serialized graph to the centralized registry. The PUBLISH_GRAPH is a custom environment variable that will let us control whether the graph should be published (CI/CD workflow), or not (regular application bootstrap). Also, we set the preview attribute here to true. With this flag enabled, our application will bootstrap in the preview mode - which basically means that constructors (and lifecycle hooks) of all controllers, enhancers, and providers in our application will not be executed. Note - this isn't required, but makes things simpler for us since in this case we won't really have to connect to the database etc. when running our application in the CI/CD pipeline.
The publishOptions object will vary depending on the CI/CD provider you're using. We will provide you with instructions for the most popular CI/CD providers below, in later sections.
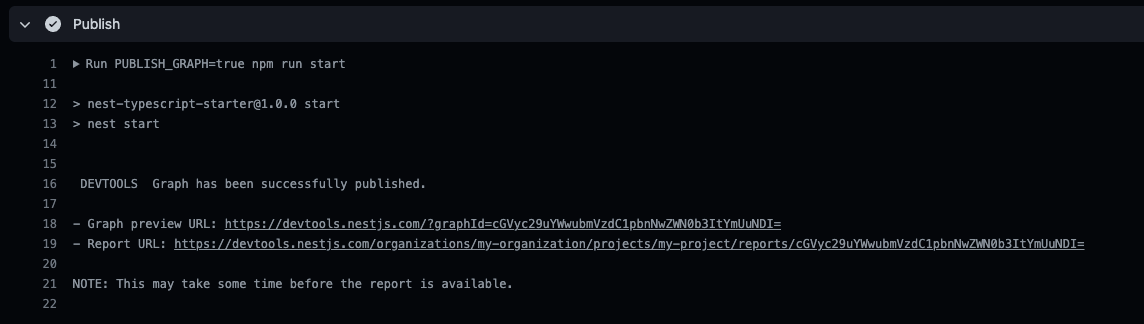
Once the graph is successfully published, you'll see the following output in your workflow view:
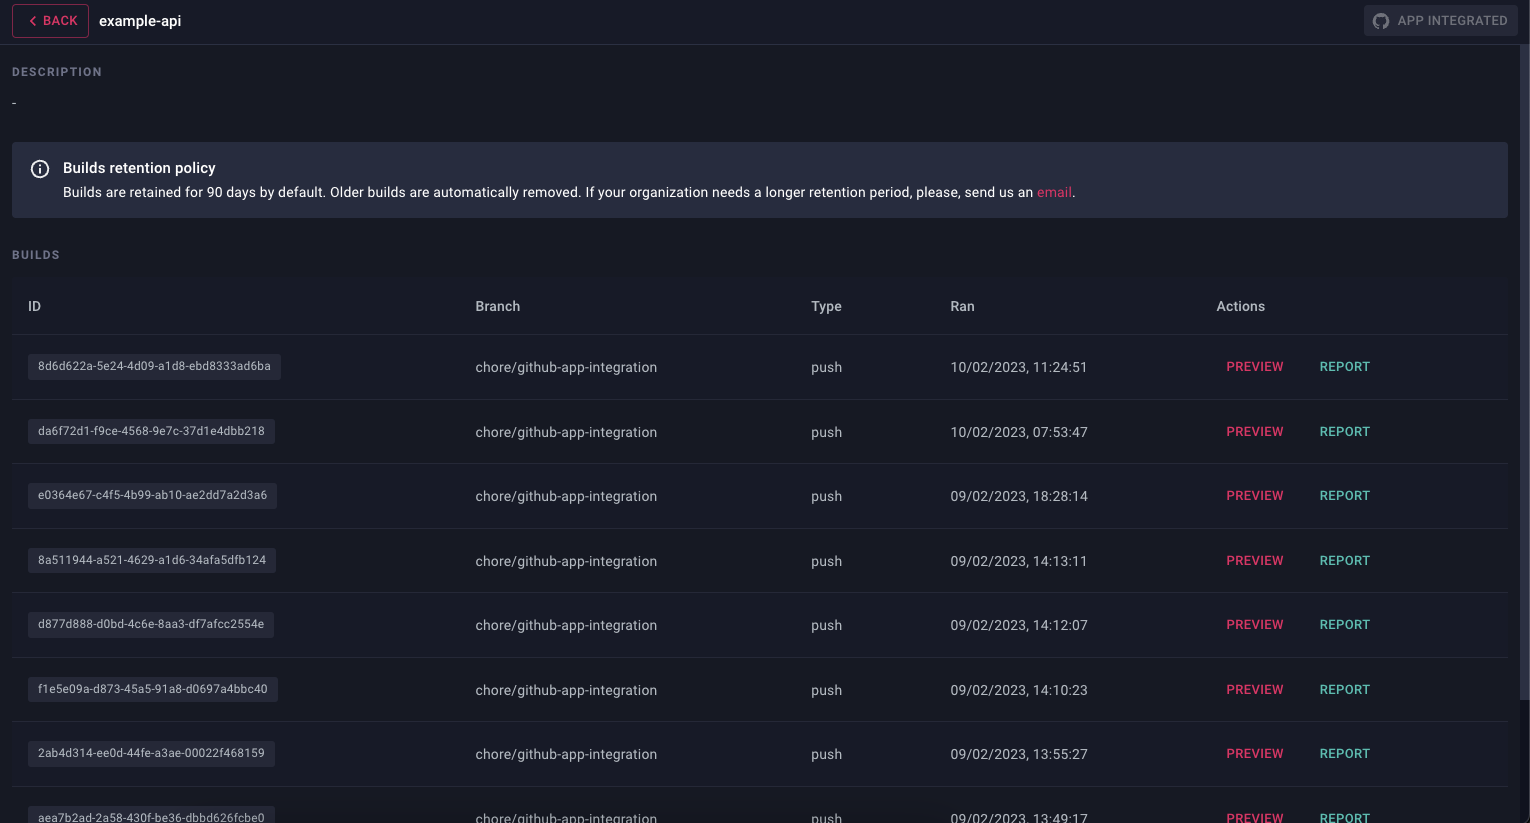
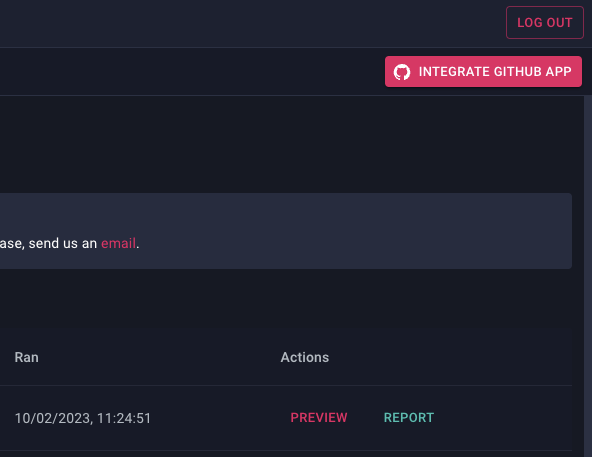
Every time our graph is published, we should see a new entry in the project's corresponding page:
Reports
Devtools generate a report for every build IF there's a corresponding snapshot already stored in the centralized registry. So for example, if you create a PR against the master branch for which the graph was already published - then the application will be able to detect differences and generate a report. Otherwise, the report will not be generated.
To see reports, navigate to the project's corresponding page (see organizations).
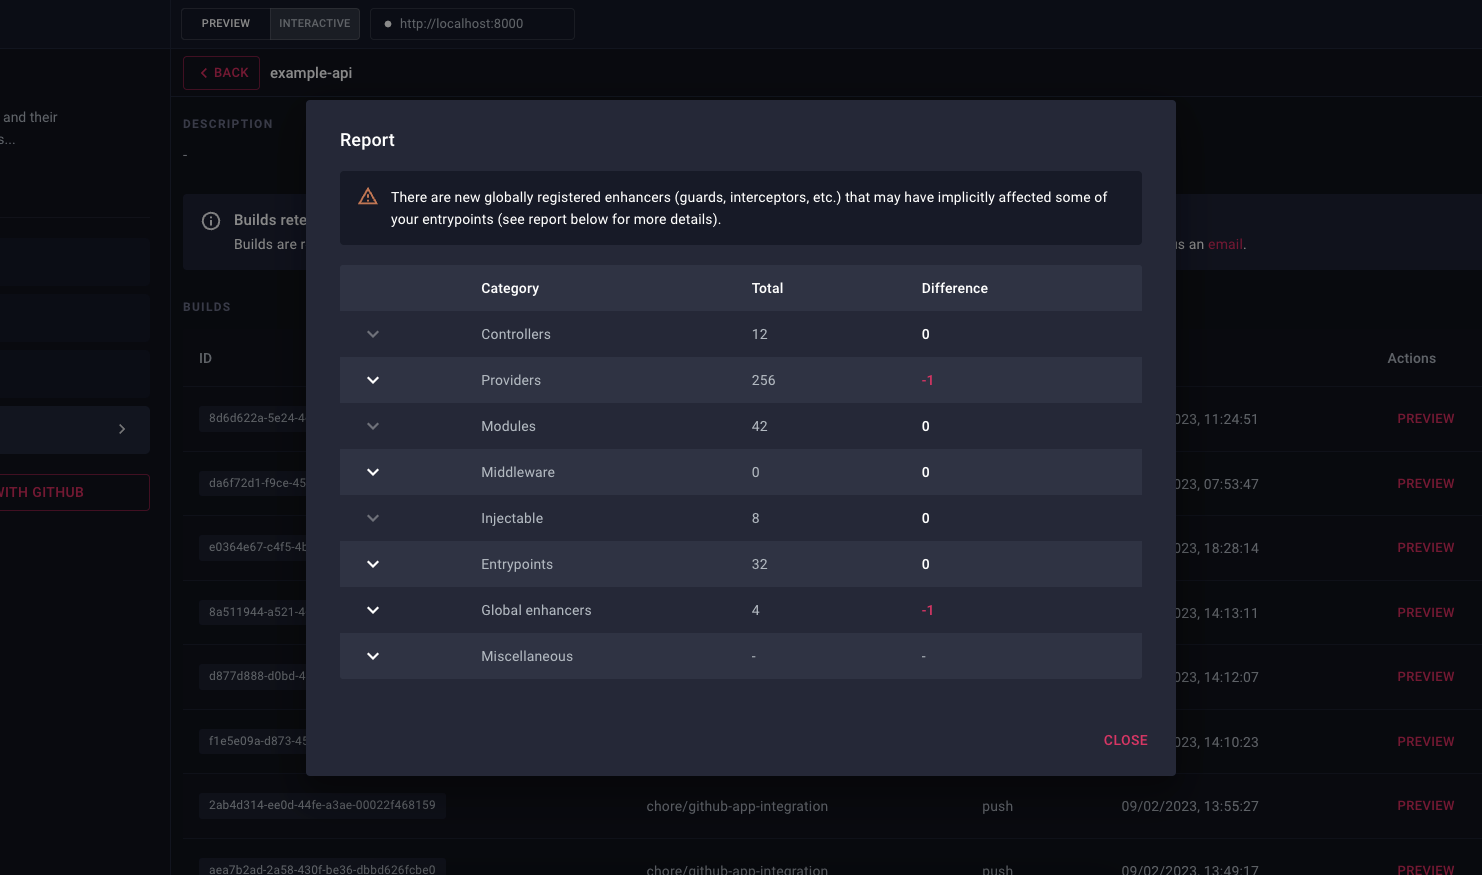
This is particularly helpful in identifying changes that may have gone unnoticed during code reviews. For instance, let's say someone has changed the scope of a deeply nested provider. This change might not be immediately obvious to the reviewer, but with Devtools, we can easily spot such changes and make sure that they're intentional. Or if we remove a guard from a specific endpoint, it will show up as affected in the report. Now if we didn't have integration or e2e tests for that route, we might not notice that it's no longer protected, and by the time we do, it could be too late.
Similarly, if we're working on a large codebase and we modify a module to be global, we'll see how many edges were added to the graph, and this - in most cases - is a sign that we're doing something wrong.
Build preview
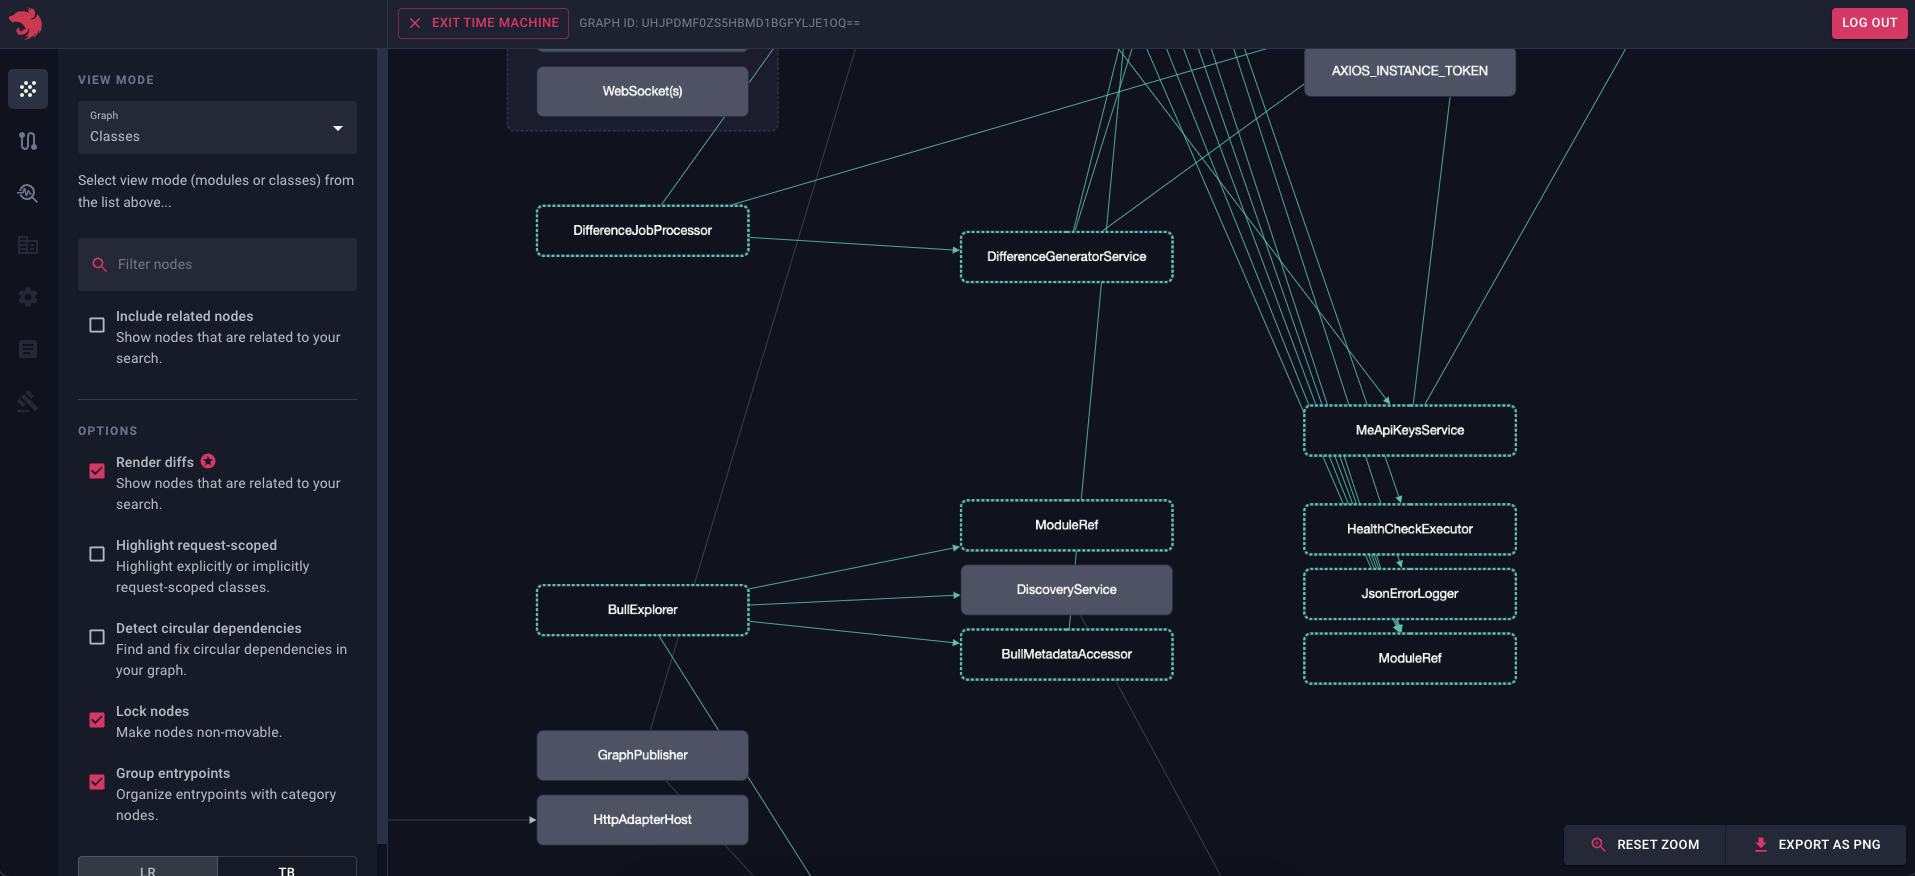
For every published graph we can go back in time and preview how it looked before by clicking at the Preview button. Furthermore, if the report was generated, we should see the differences highlighted on our graph:
- green nodes represent added elements
- light white nodes represent updated elements
- red nodes represent deleted elements
See screenshot below:
The ability to go back in time lets you investigate and troubleshoot the issue by comparing the current graph with the previous one. Depending on how you set things up, every pull request (or even every commit) will have a corresponding snapshot in the registry, so you can easily go back in time and see what changed. Think of Devtools as a Git but with an understanding of how Nest constructs your application graph, and with the ability to visualize it.
Integrations: GitHub Actions
First let's start from creating a new GitHub workflow in the .github/workflows directory in our project and call it, for example, publish-graph.yml. Inside this file, let's use the following definition:
name: Devtools

on:
  push:
    branches:
      - master
  pull_request:
    branches:
      - '*'

jobs:
  publish:
    if: github.actor!= 'dependabot[bot]'
    name: Publish graph
    runs-on: ubuntu-latest
    steps:
      - uses: actions/checkout@v3
      - uses: actions/setup-node@v3
        with:
          node-version: '16'
          cache: 'npm'
      - name: Install dependencies
        run: npm ci
      - name: Setup Environment (PR)
        if: {{ '${{' }} github.event_name == 'pull_request' {{ '}}' }}
        shell: bash
        run: |
          echo "COMMIT_SHA={{ '${{' }} github.event.pull_request.head.sha {{ '}}' }}" >>\${GITHUB_ENV}
      - name: Setup Environment (Push)
        if: {{ '${{' }} github.event_name == 'push' {{ '}}' }}
        shell: bash
        run: |
          echo "COMMIT_SHA=\${GITHUB_SHA}" >> \${GITHUB_ENV}
      - name: Publish
        run: PUBLISH_GRAPH=true npm run start
        env:
          DEVTOOLS_API_KEY: CHANGE_THIS_TO_YOUR_API_KEY
          REPOSITORY_NAME: {{ '${{' }} github.event.repository.name {{ '}}' }}
          BRANCH_NAME: {{ '${{' }} github.head_ref || github.ref_name {{ '}}' }}
          TARGET_SHA: {{ '${{' }} github.event.pull_request.base.sha {{ '}}' }}
Ideally, DEVTOOLS_API_KEY environment variable should be retrieved from GitHub Secrets, read more here .
This workflow will run per each pull request that's targeting the master branch OR in case there's a direct commit to the master branch. Feel free to align this configuration to whatever your project needs. What's essential here is that we provide necessary environment variables for our GraphPublisher class (to run).
However, there's one variable that needs to be updated before we can start using this workflow - DEVTOOLS_API_KEY. We can generate an API key dedicated for our project on this page.
Lastly, let's navigate to the main.ts file again and update the publishOptions object we previously left empty.
const publishOptions = {
  apiKey: process.env.DEVTOOLS_API_KEY,
  repository: process.env.REPOSITORY_NAME,
  owner: process.env.GITHUB_REPOSITORY_OWNER,
  sha: process.env.COMMIT_SHA,
  target: process.env.TARGET_SHA,
  trigger: process.env.GITHUB_BASE_REF ? 'pull' : 'push',
  branch: process.env.BRANCH_NAME,
};
For the best developer experience, make sure to integrate the GitHub application for your project by clicking on the "Integrate GitHub app" button (see screenshot below). Note - this isn't required.
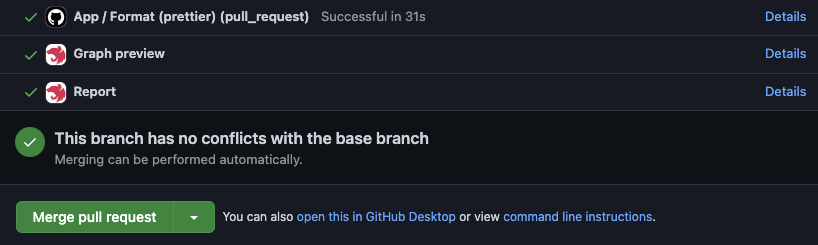
With this integration, you'll be able to see the status of the preview/report generation process right in your pull request:
Integrations: Gitlab Pipelines
First let's start from creating a new Gitlab CI configuration file in the root directory of our project and call it, for example, .gitlab-ci.yml. Inside this file, let's use the following definition:
const publishOptions = {
  apiKey: process.env.DEVTOOLS_API_KEY,
  repository: process.env.REPOSITORY_NAME,
  owner: process.env.GITHUB_REPOSITORY_OWNER,
  sha: process.env.COMMIT_SHA,
  target: process.env.TARGET_SHA,
  trigger: process.env.GITHUB_BASE_REF ? 'pull' : 'push',
  branch: process.env.BRANCH_NAME,
};
info Hint Ideally,
DEVTOOLS_API_KEYenvironment variable should be retrieved from secrets.
This workflow will run per each pull request that's targeting the master branch OR in case there's a direct commit to the master branch. Feel free to align this configuration to whatever your project needs. What's essential here is that we provide necessary environment variables for our GraphPublisher class (to run).
However, there's one variable (in this workflow definition) that needs to be updated before we can start using this workflow - DEVTOOLS_API_KEY. We can generate an API key dedicated for our project on this page .
Lastly, let's navigate to the main.ts file again and update the publishOptions object we previously left empty.
image: node:16

stages:
  - build

cache:
  key:
    files:
      - package-lock.json
  paths:
    - node_modules/

workflow:
  rules:
    - if: $CI_PIPELINE_SOURCE == "merge_request_event"
      when: always
    - if: $CI_COMMIT_BRANCH == "master" && $CI_PIPELINE_SOURCE == "push"
      when: always
    - when: never

install_dependencies:
  stage: build
  script:
    - npm ci

publish_graph:
  stage: build
  needs:
    - install_dependencies
  script: npm run start
  variables:
    PUBLISH_GRAPH: 'true'
    DEVTOOLS_API_KEY: 'CHANGE_THIS_TO_YOUR_API_KEY'
Other CI/CD tools
Nest Devtools CI/CD integration can be used with any CI/CD tool of your choice (e.g., Bitbucket Pipelines , CircleCI, etc) so don't feel limited to providers we described here.
Look at the following publishOptions object configuration to understand what information is required to publish the graph for a given commit/build/PR.
const publishOptions = {
  apiKey: process.env.DEVTOOLS_API_KEY,
  repository: process.env.CI_PROJECT_NAME,
  owner: process.env.CI_PROJECT_ROOT_NAMESPACE,
  sha: process.env.CI_COMMIT_SHA,
  target: process.env.CI_MERGE_REQUEST_DIFF_BASE_SHA,
  trigger: process.env.CI_MERGE_REQUEST_DIFF_BASE_SHA ? 'pull' : 'push',
  branch:
    process.env.CI_COMMIT_BRANCH ??
    process.env.CI_MERGE_REQUEST_SOURCE_BRANCH_NAME,
};
Most of this information is provided through CI/CD built-in environment variables (see CircleCI built-in environment list and Bitbucket variables ).
When it comes to the pipeline configuration for publishing graphs, we recommend using the following triggers:
pushevent - only if the current branch represents a deployment environment, for examplemaster,main,staging,production, etc.pull requestevent - always, or when the target branch represents a deployment environment (see above)